Textural Wall Treatments
Textural treatments are authentic—and back in fashion.
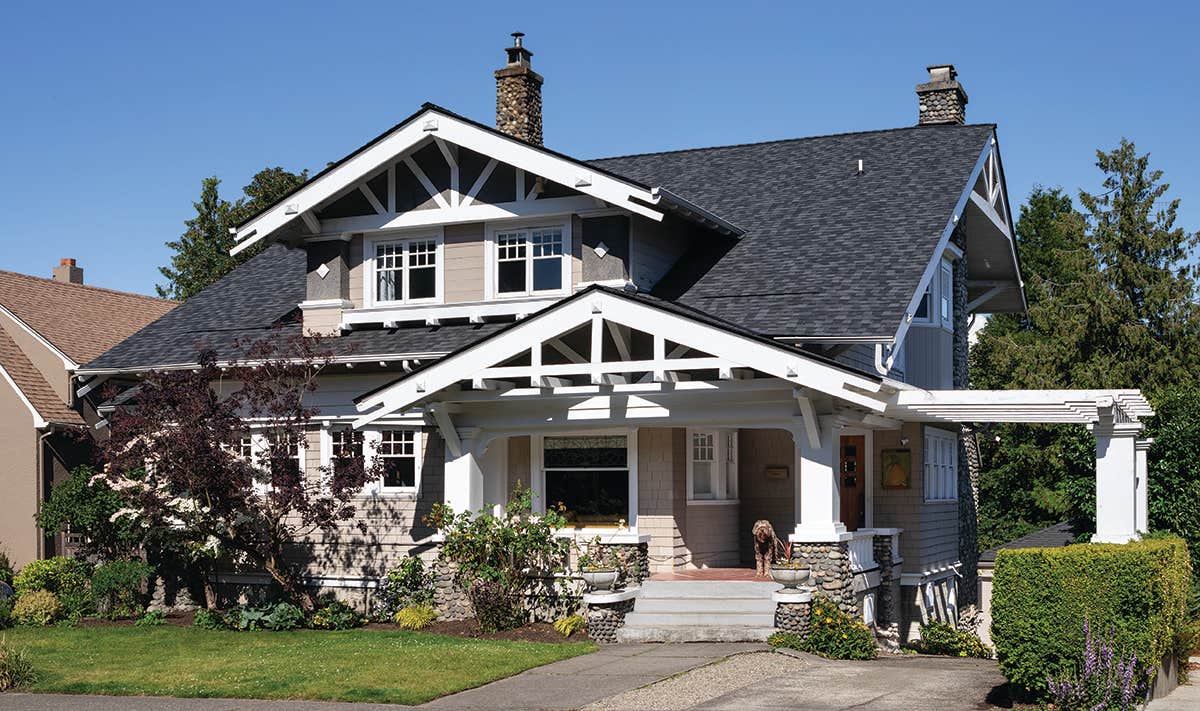
Looking for an in-character solution for the walls in her 1917 American Foursquare, New Jersey homeowner Leslie Holasek remembered a trick she’d learned growing up in a house of similar age: adding sand to the paint.
Her parents chose that finish to discourage their children’s habit of running their hands over the walls. As it turns out, sand-textured paint was one of many recommended treatments for Arts & Crafts-era houses with walls finished in either rough-finished plaster or a rudimentary type of wallboard. As the walls were not considered beautiful in and of themselves, homeowners and decorating pundits improvised with materials and methods in tune with the Arts & Crafts philosophy of a simple, natural look.
Besides simple sand paint, many proprietary formulas can transform drywall into something that resembles tinted or textured plaster or stucco. They are easier to use than finishes of a century ago. (The Craftsman magazine urged its readers to tint plaster while still wet with such desirable colors as ochre or sienna—not something today’s homeowners and contractors would do.) Most of these specialty finishes fall into one of two categories: clay plaster or Venetian plaster. Clay plasters are more earthy than Venetians, which have a characteristic high sheen that comes from marble dust.
Easy to smooth and shape into desired textures, the modern finishes also take well to tinting. Use them to create rough or sand-textured finishes, or smooth finishes resembling adobe. All formulations are more user-friendly than are real plaster and stucco.
Applying clay or Venetian plaster will require mixing up small batches as you work. You’ll need a mud mixer attached to a power tool such as a drill. The medium is heavy; layer a small amount on a plasterer’s hawk and apply it with a thin rectangular trowel. Setup and curing times are an important part of a successful result.
As for decorative painted finishes, stenciling is the most obvious. For specific types of textures, faux artists use tools that can drag, stipple, sponge, or otherwise manipulate the paint into various patterns, from stripes (dragging, or strié) to pointillist dots (stippling). While professionals use a remarkably small array of brushes for given effects (you can apparently get a lot of interesting looks out of a handful of stiff- and soft-bristled brushes), they also incorporate such tools as cloth-wrapped combs, rags, and sea sponges in their tool kits.
SAND PAINT
Adding sand to paint gives walls a slightly rough, textural finish with a subtle sparkle and good depth. You can choose a premixed formula from one of several paint companies (see p. 33) or mix sand into the paint yourself. Buy clean silica sand packaged specifically for use with either latex or waterproof paint at home-improvement and hardware stores, typically in fine, medium, and coarse grades. The mix ratio is usually one packet per gallon of paint, but you can experiment with different amounts to achieve the desired texture. Mixing your own also allows for more leeway in choosing base paint (semi-gloss or flat, for instance). Ask to have the sand added to the paint at the same time it’s being tinted at the store. One caveat: If you don’t like the results, painting over a sand finish won’t get rid of it; you’ll have to sand or scrape it off.
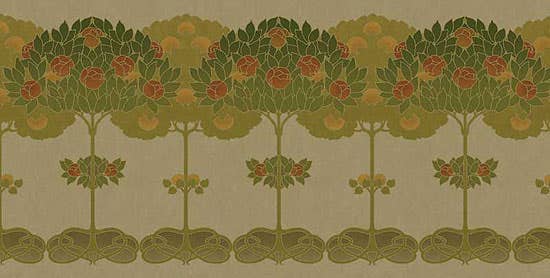
STENCIL PATTERNS
As decorative as a wallpaper frieze (and less expensive if you do it yourself), decorative stenciling was more popular for walls in Arts & Crafts times than is generally thought. A painted border, which is not as deep as a frieze, fits rooms of smaller scale. Authentic patterns abound: A single article in The Craftsman, ca. 1905, illustrates more than half a dozen patterns, with motifs ranging from stylized roses and wild carrot blossoms to ivy, poppy, and periwinkle. Many of these motifs were adapted for stencil decoration. “Stickley wanted people to participate in decorating their homes,” says Amy Miller of Trimbelle River Studio & Design. “Stenciling was an easy way to do it.”
To create a stenciled pattern, lightly tape a plastic or heavy paper stencil at a good starting point on a prepared wall. Apply the paint through the openings to create the design. DIY hint: Oil-based artists’ paint sticks are an easy way to apply and blend a variety of colors using a single stencil.
EMBOSSED COVERINGS
High-relief wall coverings, including linoleum-like Lincrusta, paper-based Anaglypta, and both plain and embossed leathers, carried over from the Victorian era into the Arts & Crafts period, with new introductions in a more restrained style. (Stickley actually recommended leather—now a luxury because of the price—as “unobtrusive.”) Many of these treatments are still available in designs as fresh today as they were a century ago. Lincrusta and Anaglypta are pasted to the wall unfinished, and may be painted or treated to a faux or decorative treatment.
ROUGH FABRIC
Burlap, hemp, and grasscloth were used for lining walls or wainscot panels in Arts & Crafts interiors. While the grasscloth walls in such high-style interiors as the 1908 Glensheen Mansion in Minnesota were treated to a silvered finish, hemp or burlap was glued in panels directly to the wall in more homely bungalows. (For a more finished look, vertical wood battens topped with a plate rail were installed over the fabric to create a wainscot.)
Finding hemp or burlap in a tight enough weave to fix to a wall is difficult. (Hint: The fabric must be completely opaque when held up to a light source.) As an alternative, use medium- to heavy-weight linen or “bungalow cloth”—or opt for one of the dozens of “burlap” wallpapers that have popped up in recent years. (Bradbury & Bradbury has one, as does Ralph Lauren!)
TIFFANY FINISH
Another trend in the 1910s and ’20s was the Tiffany or jazz finish. An authentic version requires laying down a base color, allowing it to dry thoroughly, then applying at least three distinct colors of thin, darker glazes. The colors were usually taken from other elements on the walls or in the house, including friezes, stencils, or art-glass windows. Glaze colors are applied in a random fashion to a small section of the prepared wall, then blended into each other while still wet using a circular motion and a clean rag. Highlights are wiped out, allowing the base color and various tints to show through. “The resulting misty, mottled texture has been likened to the blended, matte glazes on the era’s art pottery,” wrote Paul Duchscherer in Beyond the Bungalow.
It’s possible to get a similar result using a tintable water-based glaze from specialty decorative paint suppliers.
Mary Ellen Polson is a creative content editor and technical writer with over 20 years experience producing heavily illustrated know how and service journalism articles, full-length books, product copy, tips, Q&As, etc., on home renovation, design, and outdoor spaces.